|
|
|
|
Expense users (and their alternates) utilize the expense reports to record expenses and comments. Users can navigate to their expense reports via the Expense menu option. Users can also navigate to their expense reports via one of the many expense lists (available on a number of system dashboards and on the Expense >> List screen).
Unanet has support for entering Expense Requests (aka Authorizations) in addition to Expense Reports. This Basics help page only addresses expense report. See Working With Expenses for more information about Expense Requests.
Before a user can enter expenses, they may need to review and manage which projects will appear on their expense reports. Depending on how your site is managed, project managers may control which projects are available by making explicit Assignments, or user's may need to "Self Assign" themselves to a project. See Managing List of Projects for more information.
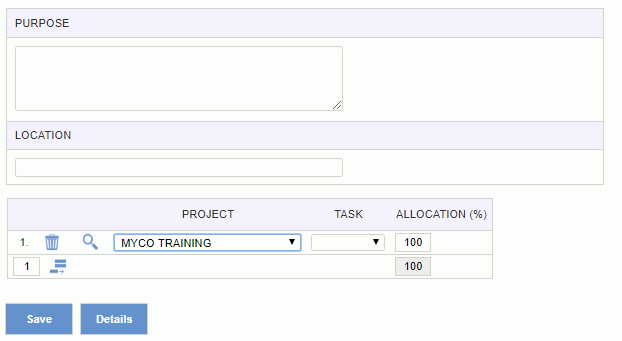
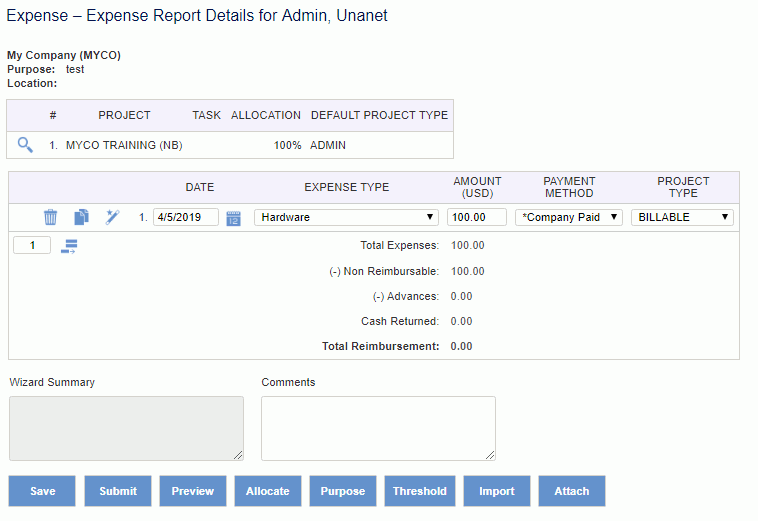
An example expense report Purpose and Details page appears below.

Once the purpose page has been completed, the user can navigate to the Details page by clicking on the Details button, where they can enter the expense line items.

At a minimum, each expense line item will require a date, expense type, amount, payment type and project type. Depending on your site's configuration and how many projects you may have included on the Purpose page, there may be additional fields.
Further, some of the expense types may have an associated wizard, where a popup screen will display upon clicking in the Amount field. In these cases, you will be required to provide additional details in the wizard popup. Hitting save on the wizard popup will transfer the resulting amount back to the expense report where you can continue entering additional expenses.
Note that which expense types are available can be limited by Employee Type as well as on a project by project basis.
Users can also record Comments for each line item in the Comments text entry field. New rows can be added to the expense report using the ![]() control if additional lines are required. Clicking on the Save button will save the expense report entries. Depending on how your system is configured, your expense report may look slightly different than the example above.
control if additional lines are required. Clicking on the Save button will save the expense report entries. Depending on how your system is configured, your expense report may look slightly different than the example above.
See Working With Expenses for more in depth information about the expense reports and available options.
Once you have completed your expense entry, you will be required to submit your expense report. Again, depending on your site's configuration, your expense report may require approval by one or many Managers or Project Approvers.
To create a new expense report, click on the ![]() link, available on several screens which display a list of expense reports, including the Expense >> List screen and various dashboard.
link, available on several screens which display a list of expense reports, including the Expense >> List screen and various dashboard.